How to Paint Snowy Landscapes in Portraits: Tips for Oil, Acrylic, and Watercolor Artists
- Jen Sequel
- Dec 16, 2024
- 3 min read


Snowy landscapes hold a magical allure, offering an excellent opportunity for artists to experiment with light, texture, and color. Incorporating snowy settings into portraits adds a serene and atmospheric quality that can elevate your art. Here are tips tailored to oil, acrylic, and watercolor mediums to help you master this enchanting subject.
General Tips for Painting Snowy Landscapes
Understand Snow’s Colors: Snow isn’t purely white. Observe its subtle hues—shades of blue, violet, and even pink often appear due to reflected light and shadows.
Focus on Contrast: Use tonal variations to highlight the contrast between the snow, the landscape, and your portrait subject.
Blend Soft Edges: Snowy landscapes often have soft edges, especially during a snowfall. Use blending techniques to capture this effect.
Add Depth with Layers: Build layers to achieve the illusion of depth in the snow, trees, and background.
Tips for Oil Painters

Oil paints are ideal for snowy landscapes because of their blending capabilities and vibrant pigments.
Choose the Right Colors:
Mix ultramarine blue and titanium white for shadows.
Use cadmium orange or alizarin crimson sparingly for warm highlights.
Incorporate gray tones for overcast skies or snow-covered trees.
Build Gradually:
Start with an underpainting to map out your composition. Burnt umber or a muted blue works well for snowy scenes.
Layer thicker paint over thinner layers, creating texture to mimic the uneven surface of snow.
Use Palette Knives:
A palette knife is excellent for adding rough snow textures on branches or rocky surfaces.
Scrape gently to reveal underlying layers, creating highlights and shadows.
Create Atmospheric Effects:
Blend soft transitions in the sky and snow using brushes like filberts or fans.
For falling snow, use a splatter technique with thinned white paint or flick a stiff brush.
Tips for Acrylic Painters

Acrylics dry quickly, making them great for crisp details but requiring fast work for blending.
Extend Drying Time:
Use a retarder or slow-drying medium to keep the paint workable for longer blending periods.
Mist your palette with water to maintain paint consistency.
Layer Highlights:
Build up snow’s brightness with multiple thin layers of white to achieve a luminous effect.
Dry brush techniques work well to suggest frosty textures or windblown snow.
Experiment with Glazes:
Use glazes with blue or lavender tones over white areas to create depth and temperature variations in the snow.
Create Snowflakes:
Load a toothbrush with white paint, then flick it gently over the canvas to simulate falling snow.
For larger flakes, use a fine-tipped brush or splatter thicker paint.
Tips for Watercolor Artists
Watercolor’s transparency is perfect for capturing the soft, ephemeral quality of snowy landscapes.
Preserve Whites:
Use masking fluid to reserve areas of white for snow before starting to paint.
Alternatively, paint around the snowy areas, letting the white paper serve as your snow.
Master Wet-on-Wet Techniques:
To create soft backgrounds like snow-laden skies or distant mountains, apply color to wet paper and let it bleed naturally.
Gradually build up darker values for shadows and trees.
Use Cool Washes:
Mix cobalt blue or Payne’s gray with water for light shadows on the snow.
Layer a light wash of warm tones, like diluted burnt sienna, for sunset reflections.
Add Texture with Salt:
Sprinkle salt onto wet paint to create crystalline snow textures. Once dry, brush away the salt to reveal organic patterns.
Details with Dry Brush:
Use a dry brush with minimal water and paint to create crisp, granular effects like snow on tree branches or frosted grass.
Incorporating the Portrait Subject
Positioning: Place the subject so they harmonize with the landscape. A figure wrapped in a scarf and coat can add warmth to the scene.
Lighting: Use light reflections from the snow to highlight the subject's features subtly.
Color Palette: Tie the subject to the environment by using complementary colors. For instance, warm tones in the subject’s clothing can contrast beautifully against a cool-toned snowy backdrop.
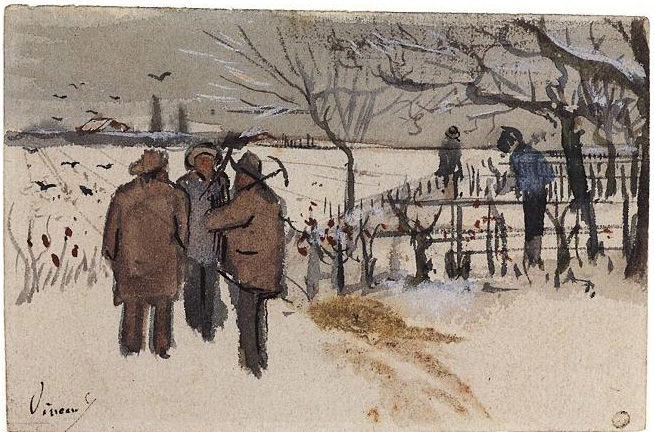
Painting snowy landscapes in portraits is as much about technique as it is about observation. Learning how the master landscape artist completed their works will help you in placing your portraits within a realistic space while also providing you the necessary tools to learn the medium you choose.
Whether you’re working with the rich texture of oils, the fast-drying versatility of acrylics, or the delicate transparency of watercolors, each medium offers unique ways to bring a snowy setting to life. Practice these tips, experiment with techniques, and let the magic of winter inspire your art.


Comments